Printing reference number from the study list
This instruction explains how to generate a reference number that can be used to access one or more studies online.
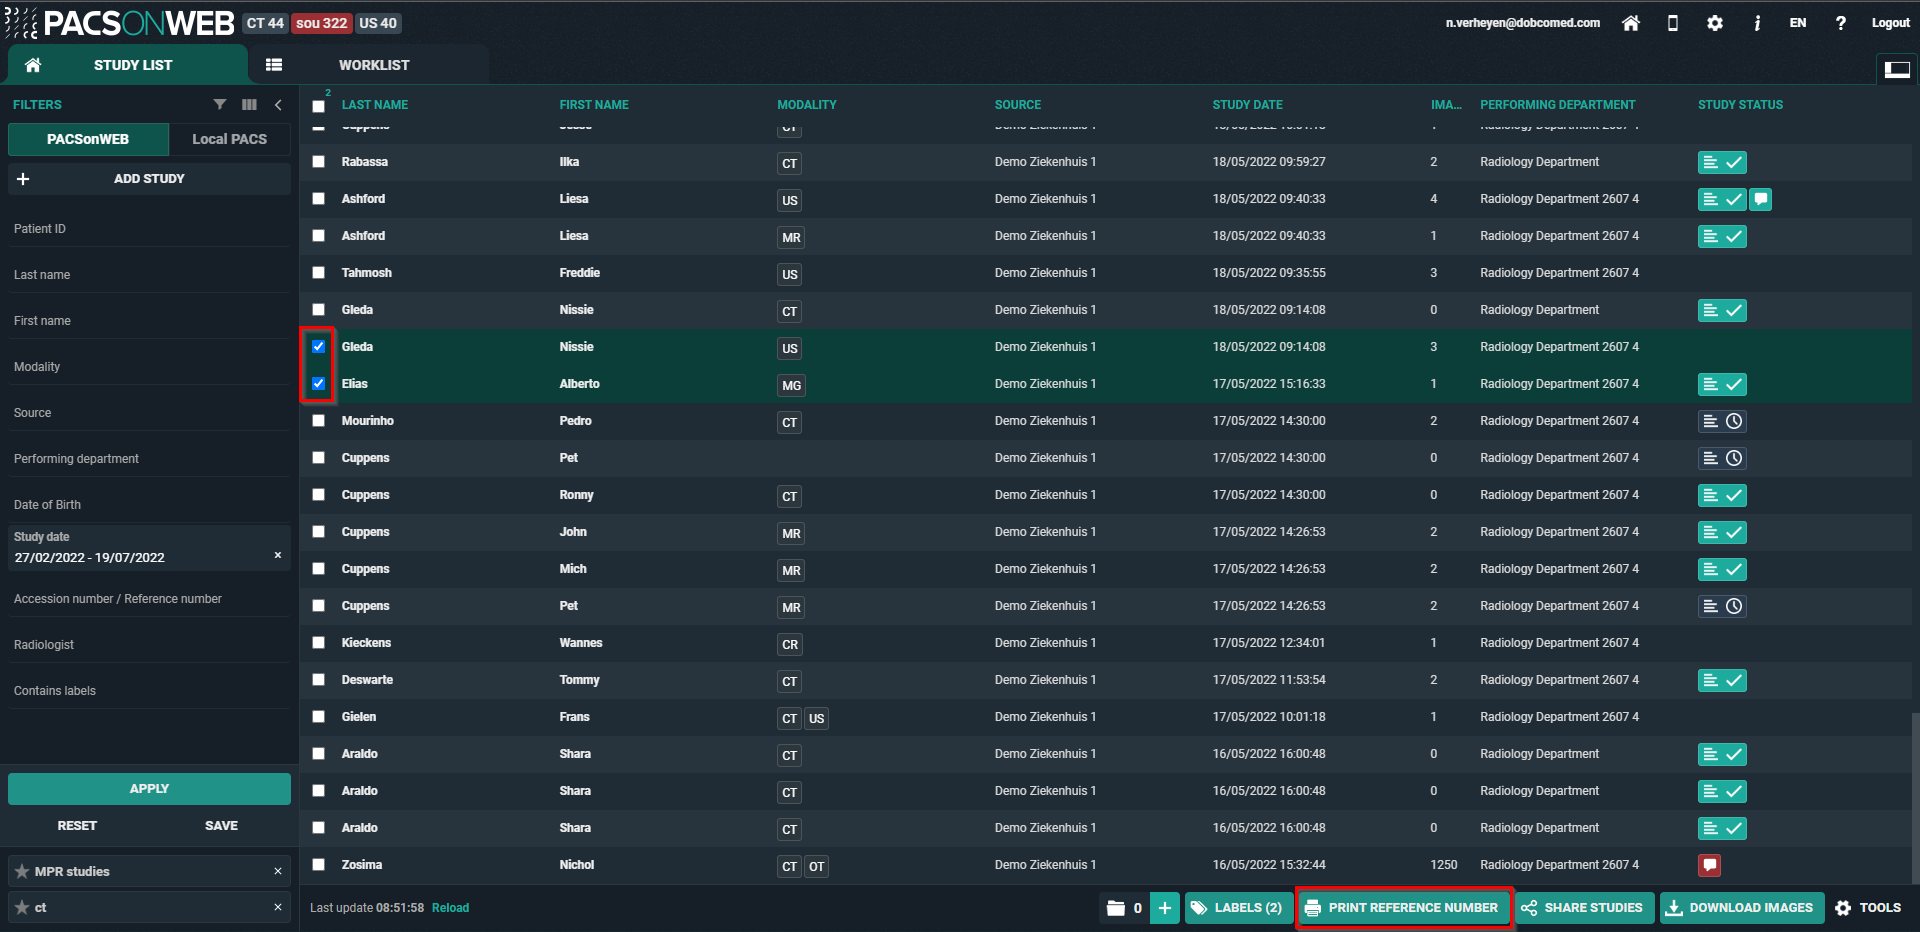
STEP 1: Select the studies for which you want to print a reference number
Select the studies for which you want to print a reference number and click PRINT REFERENCE NUMBER.
STEP 2: Set the parameters
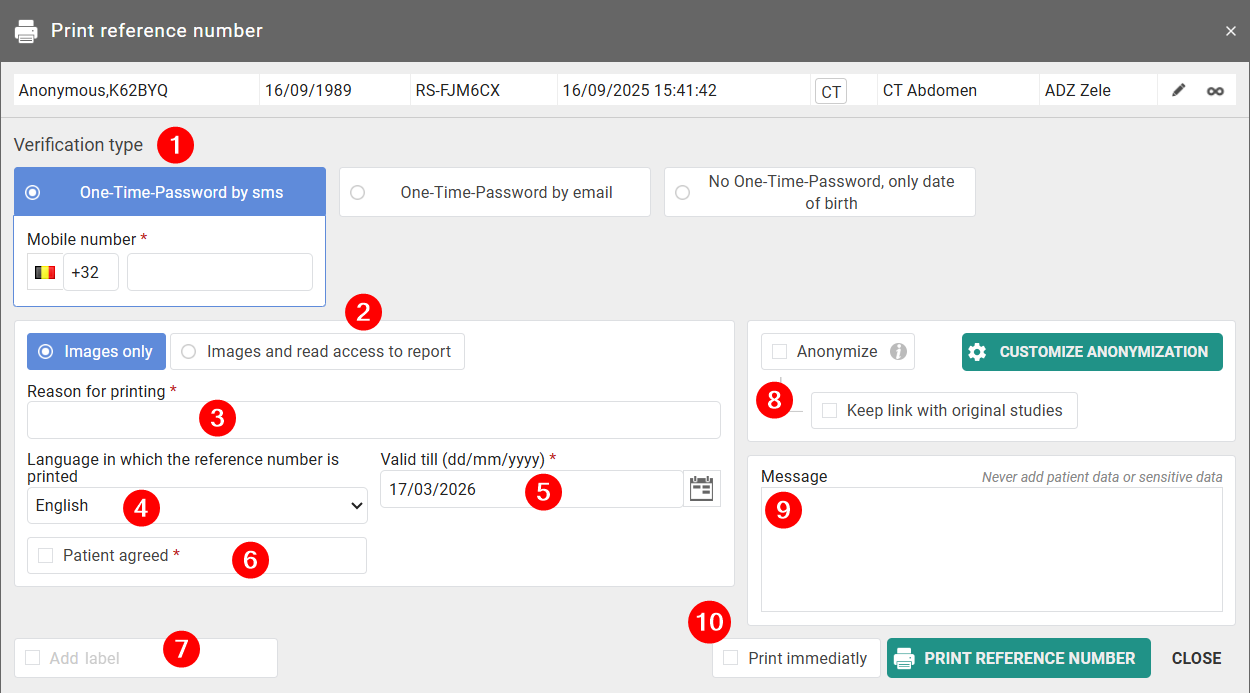
1. Select a verification type:
◦ One Time Password by sms
◦ One Time Password by email
◦ No One Time Password, only date of birth
Important | |
 | If, in case of verification type 1 or 2, the user enters the OTP incorrectly in 5 consecutive attempts, the bucket is blocked. The bucket can be unlocked by the service desk or an admin user of the sending radiology department (see Status Forwarding ). |
2. Choose to print a reference number for:
◦ Images only; or
◦ Images and read access to report.
3. Fill out a Reason for printing. This reason will not be printed but is mandatory and will be registered in DeepUnity PACSonWEB.
4. Select the language of the document that will be created. It is a letter containing instructions for the patient on how to use the reference number to access the exams. By default, the display language of DeepUnity PACSonWEB is selected, but you can change the language in the drop-down menu.
5. Set a validity date for the access rights. By default, the validity period is set to 1 month but you can change this by
◦ entering the desired date manually; or
◦ selecting a date, using the calendar icon.
Tip | |
 | The default validity period can be configured for each sending radiology department. DeepUnity PACSonWEB offers the possibility to define a default or maximum validity period. In case a specific configuration is desired, please contact the service desk. |
6. Check the Patient agreed checkbox. Without the patient’s consent, the reference number may not be printed.
7. Optionally, add a label to the study. Check the Add label checkbox to open the drop-down menu for selecting the label. Choose the user or group that the label should be set for.
8. Optionally, anonymize the study. This replaces the name of the patient:
◦ In DeepUnity PACSonWEB, the first name is replaced by a number and the last name is replaced by 'Anonymous'.
◦ In the letter, only 'anonymized exams' are mentioned.
Important | |
| The report for an anonymized study will never be accessible, even if you selected the option Images and read access on the report. |
9. Optionally, add a message.
If a message is entered, when printing the reference number, the message is not available as a separate series within the exam and no label 'message' is added. It is added to the letter that will be created.
10. Optionally, check Print immediately.
If this option is selected, when clicking PRINT REFERENCE NUMBER, the letter opens in a new tab and can be printed immediately.
If not, only the confirmation message is displayed.
Tip | |
| When printing a reference number, the same values for the following parameters are selected automatically for the next printing of a reference number: • One-Time-Password by sms / email / none • One-Time-Password by sms: country prefix • Language |
STEP 3: Confirm
Click PRINT REFERENCE NUMBER. A confirmation message with the information about the printed reference number will be displayed.
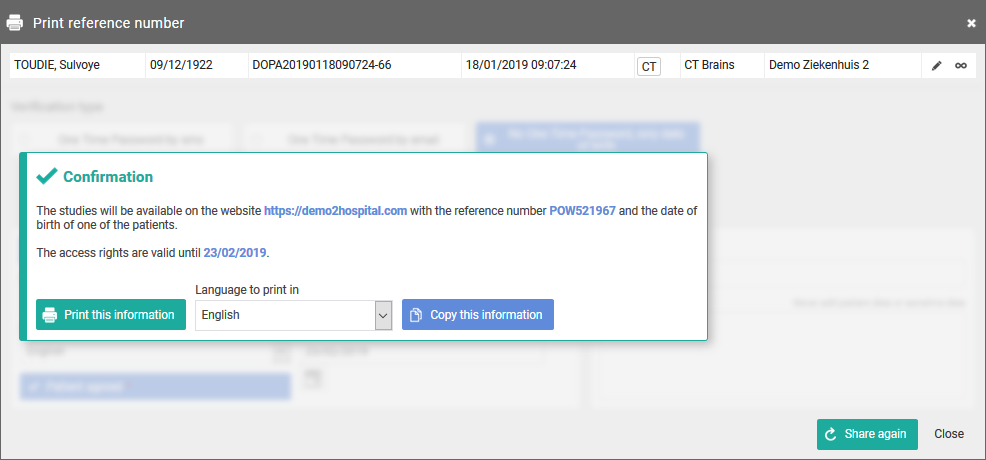
If you want to print the same letter with the reference number in another language, select the language in the drop-down menu and click PRINT THIS INFORMATION.
If you click COPY THIS INFORMATION, the content of the confirmation message is copied to the clipboard, e.g. so it can be pasted into your own email.
Click PRINT AGAIN to get back to the parameter settings and print another reference number.